|
In
2010,
a
customer from Calgary asked me to fix up a rare "Icons" brand model
of
the Star Trek Klingon Cruiser. The
models
were made by the now defunct company and were apparently actual
licensed products, as evidenced by the licensing stamp on the bottom of
the miniature. They were sold not as kits but as fully finished
replicas, reportedly very accurate. I do know that the original Klingon
cruiser as filmed was molded and cast while in possession of the model
maker who restored it for the Smithsonian display, although finally
painting it an incorrect overall battleship gray. This is the same
fellow who was also responsible for the re-treatment given to the 11
foot Enterprise filming miniature also in the Smithsonian. I am forced
to assume therefore, that one of these castings was the basis for the
Icons model and re-worked to be manufactured in limited numbers. The
model
had been damaged and a lot of the
paint was flaking off. My customer sent me a few quick snaps and I
quoted him a
price for a repair job. When
the
model arrived I saw it was in need of a lot of TLC. First, the
colour scheme was all wrong. Second, some parts had broken off or
cracked with small chunks missing and the "head" was incorrectly
attached to the neck of the ship, pointing several degrees upward
instead of in line with the rest of the ship. The "windows" up front,
made from letraset type rub down transfers were all the wrong shape and
incorrectly located. The whole thing was quite sloppily made, really,
and needed a complete overhaul. After
consulting
with the customer and getting approval to do all that was
required to make the model presentable, I started by taking the model
apart further into it's basic components as shown in the picture below. 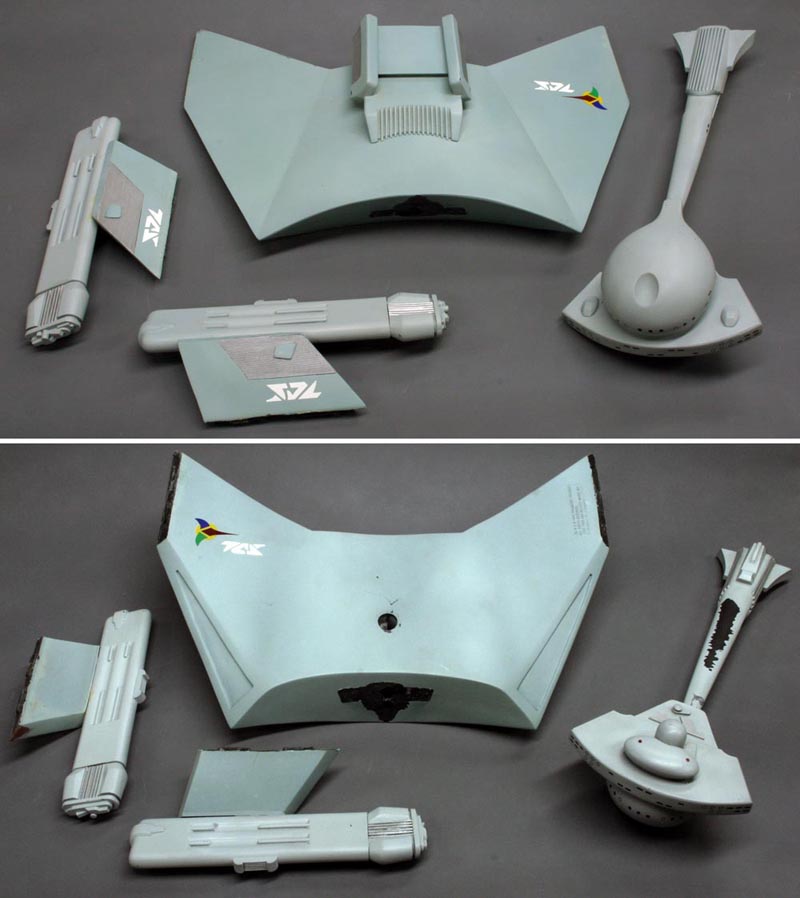
Next
the
job of stripping off the old paint began. I used a whole can of
Easy Off oven cleaner to do the job. It took several applications, as
some of the paint was on pretty thick, however, why the paint was
flaking off the neck and head became apparent.. the model had not been
properly primed in those areas, so the colour had lifted off. The
Klingon symbols were made from sign maker's vinyl, computer cut and
stuck on. Those were removed after I scanned them to get size and
proportions correct in case I needed to replicate them exactly. As it
turned out, they were the wrong size anyway.
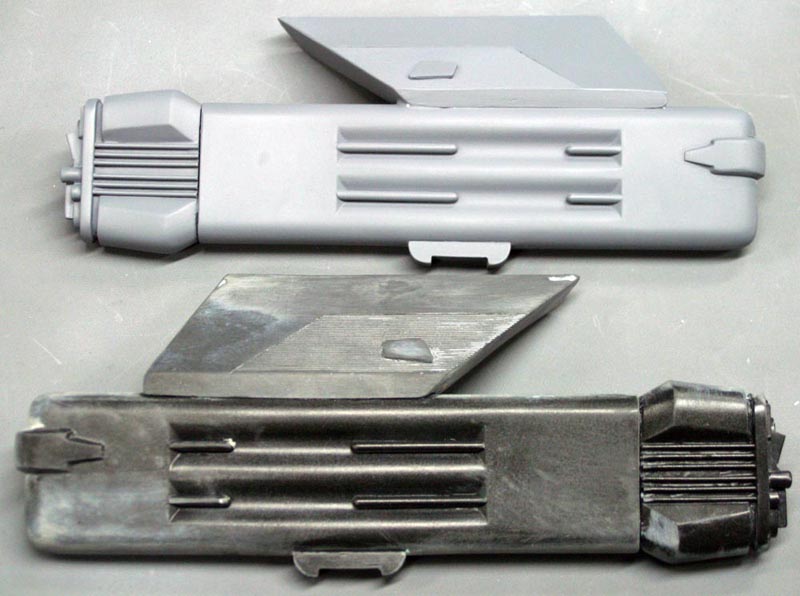
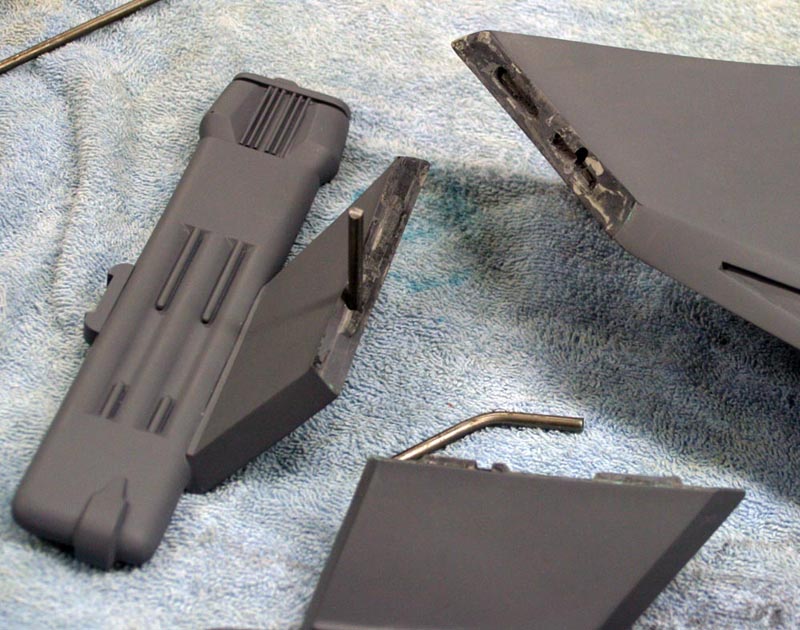
The
neck
section has a 1/4" diameter solid brass rod cast into it for
strength, and was embedded into the body and head. So to straighten out
the head-to-neck joint, I just had to use brute force and pull it free,
breaking the glue joint. I then re-drilled the hole in the head section
so the neck could be glued back in place at the correct angle, then
automotive putty and primer did the rest, as shown in the following
"before-and-after" shot....
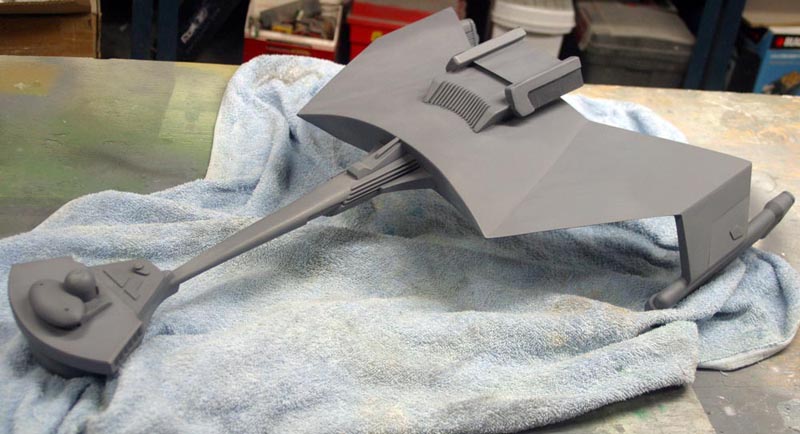
The
rest
of the model was assembled, joints filled, sanded and the whole
model was properly primed this time, ready to accept the final colour
coats.
I
had
a local automotive paint supply shop mix up the two needed colours
based on research I had done using the best information I could
find. Is
it
perfectly accurate? We may never know, as the original model's paint
job was long ago stripped off by the model maker who "restored" it,
incorrectly painting it the overall medium gray, so absolute proof of
the correct colour simply may not exist. The only way to figure it out
would be to personally examine and match the colour of the
"Roddenberry" model which sports it's original paint, but is now owned
by an unknown individual. We can assume the two models, both the
filming miniature and the second model, were painted the same colours,
but there's no guarantee of that really, is there? The colours I used
were made by matching it to the best known sources. The
green
colour on this model inadvertently had a slight metallic sheen
introduced by the paint shop, noticed once the paint was applied, but
the tone was right and the customer liked it, so it was used despite
this slight inaccuracy. Dull coat helped reduce that metallic look and
give the model an attractive sheen so all turned out well. It's
interesting
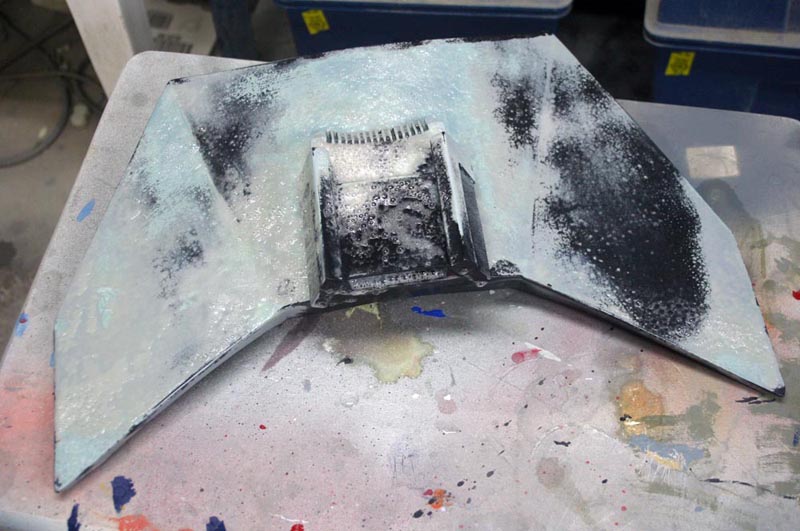
also to note here that the only serious accuracy deviation
from the original studio model is a lack of a torpedo tube (or whatever
the hole is supposed to be on the front of the head section) presumably
done to aid in manufacture. Instead of a hole, there is simply a
depression. I could have drilled this out correctly but my customer
wanted to retain the "icons" features of the model so the torpedo
launcher hole was instead simulated with carefully airbrushed paint. The
windows
were made by printing off some waterslide decals which I
created using reference to the studio model, the "Roddenberry" model
(the second original model built by AMT for the show, not filmed but
pantographed to make the AMT kit and later owned by Gene Roddenberry
for many years afterward) as well as other sources. The Klingon
markings including the three-pointed star and the white "7CS" lettering
were done with masking patterns (created in Photoshop, printed on label
paper) and paint, not decals. The model was NOT weathered as the
original was not weathered originally either, which, along with poor
lighting techniques used in 1966, is part of the reason why it looks so
toy like on screen. Realistic model making and photography for science
fiction was still in it's infancy then!
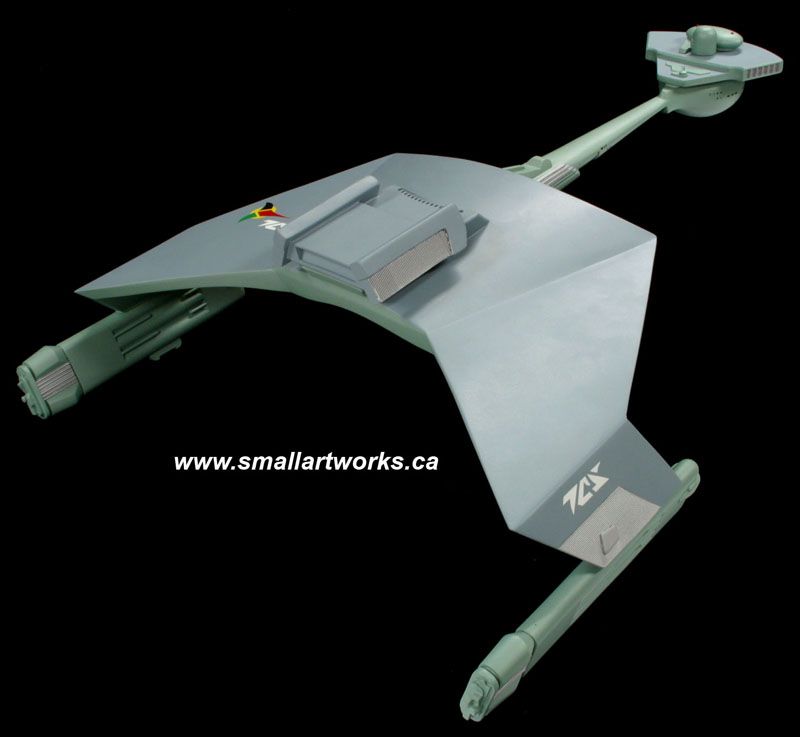
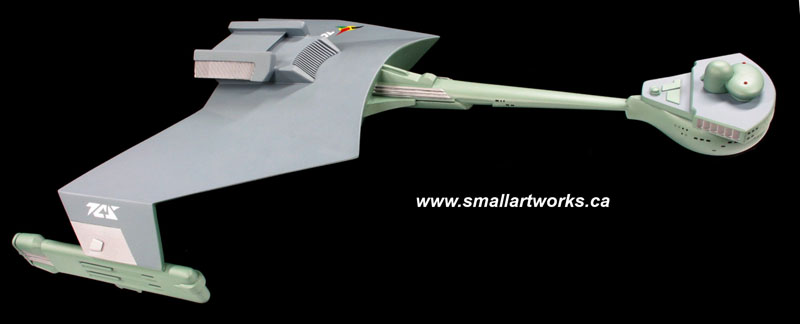
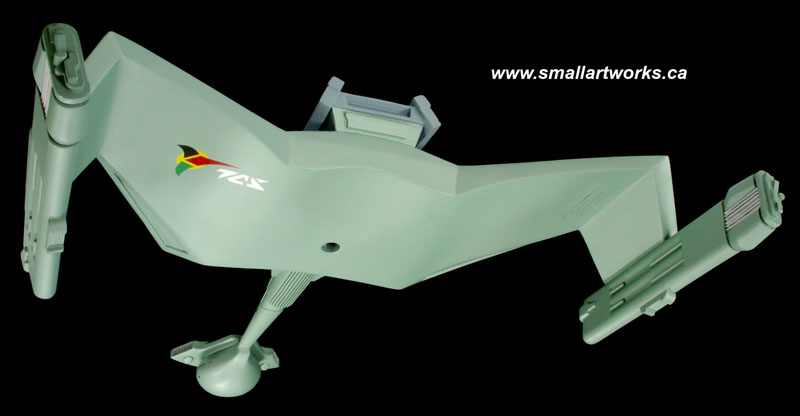
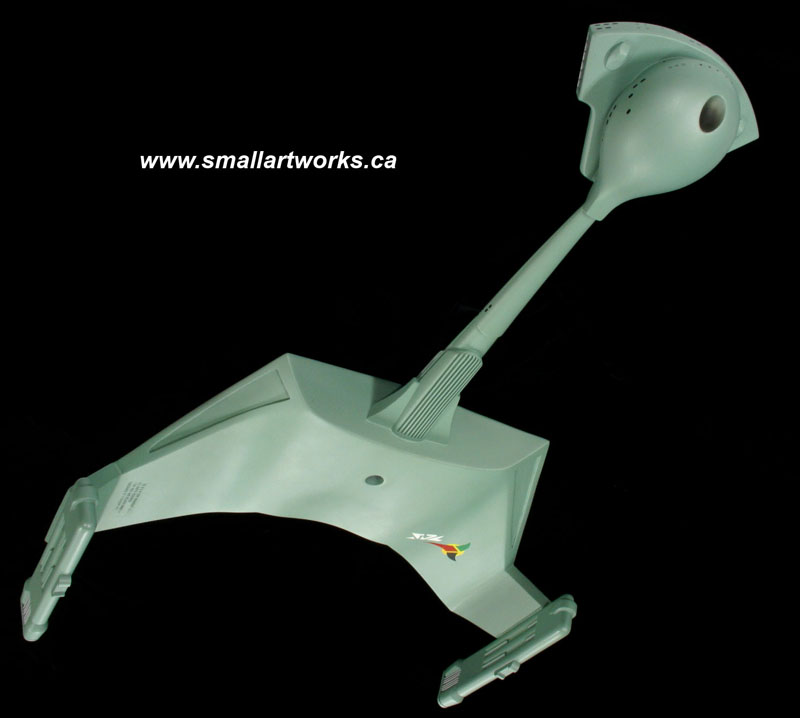
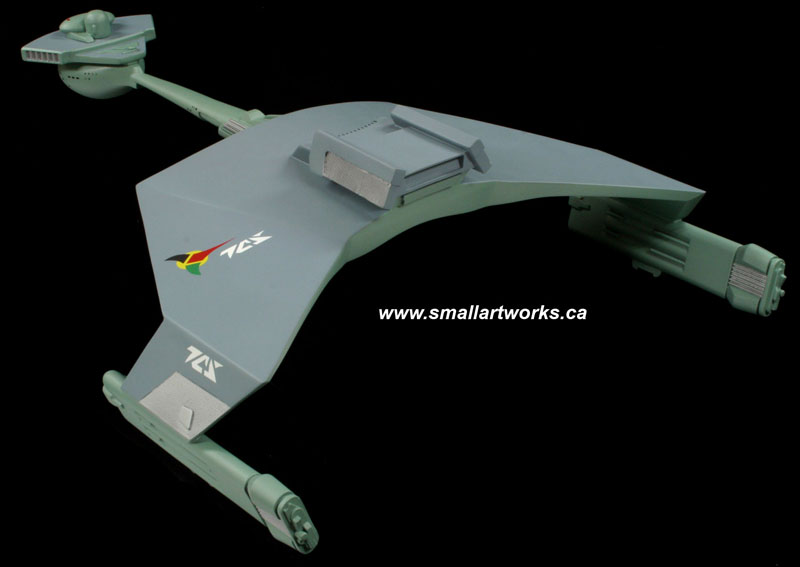
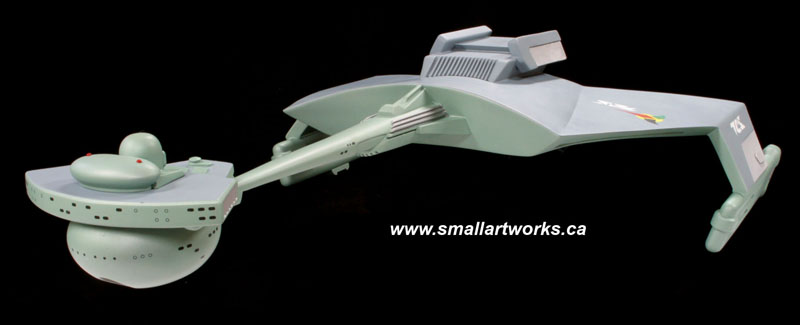
Photos
of
the finished model shown below. The hole in the bottom is for the
stand that came with the model originally. Enjoy!
Click
HERE to visit the rest
of the Small Art Works web site.
|