
Modular
PCB Wiring Bus
For lighting models and other light-duty power routing projects
(Maximum
32 volts and 2 amps)
| Note:
Although suitable for beginning hobbyists, a
basic knowledge of electronic theory, choice
of suitable components and proper soldering
techniques are required for correct use of
this product. The use of a multimeter to check
components is recommended. |
|
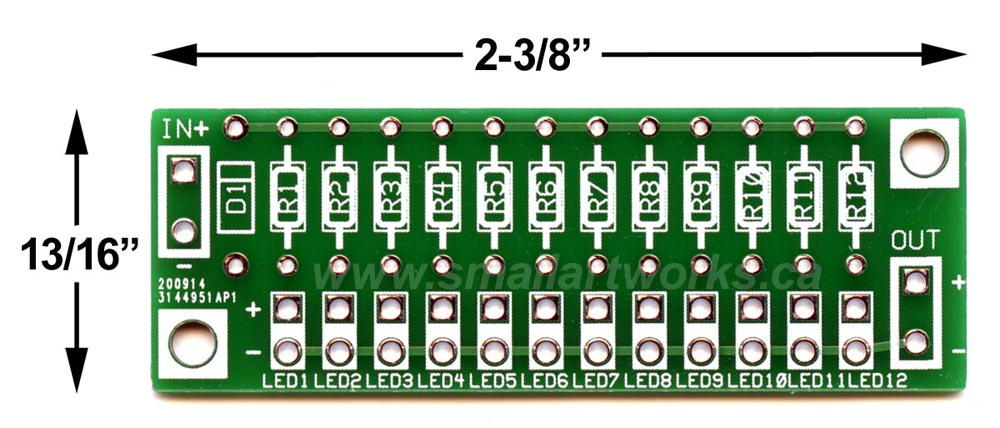
These
compact power bus boards allow you to neatly and
efficiently direct electrical power to multiple low
voltage, low current sources, such as LED lights,
small motors etc. without the need to solder a
single power wire pair to a large awkward bundled
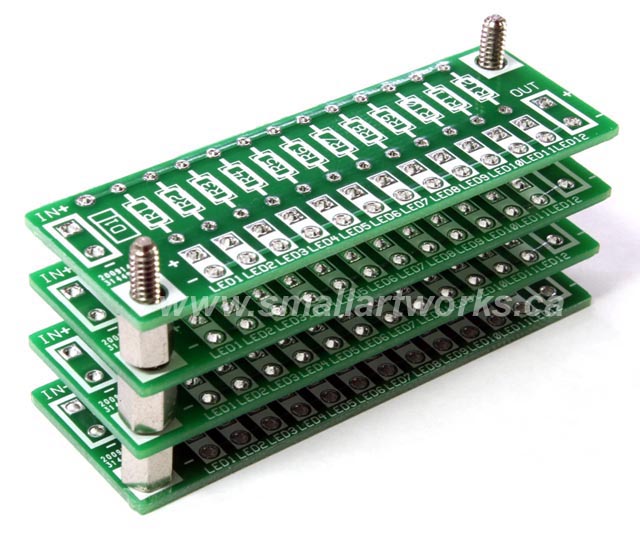
wire knot. You can gang several boards together as
you like. The board makes it easier to solder
resistors into the circuit as well, so you don't
have to fumble with trying to insulate and solder
the resistors to the component lead wires. There is
also a spot for soldering in a Shottky diode (not
included) for "idiot proofing" polarity, to protect
the components from accidental pole reversing. If
you don't want to use the diode, you can just put a
jumper wire across the "D1" terminals. Two
mounting holes are also in the corners (indicated by
large white squares) if you want to use screws to
mount the boards to your project. You can also daisy-chain or stack them, allowing you to add more units for more components. |

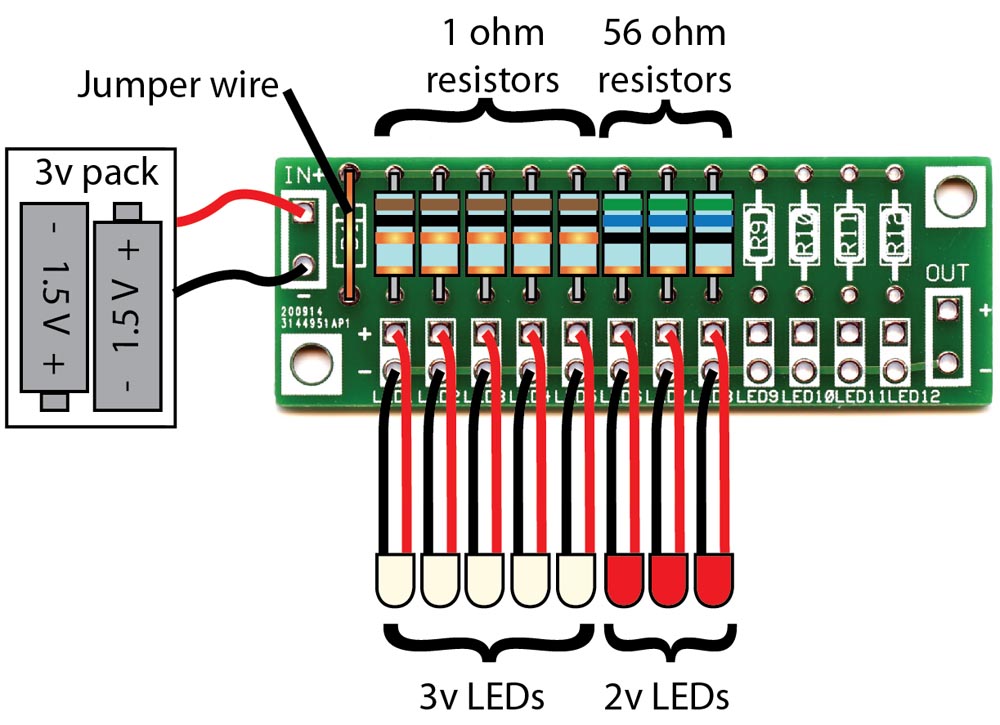
| Below are two examples of the
countless ways this board can be used, and it
is important to note that it is up to the user
to decide how best to do so, which is why some
knowledge and understanding of basic circuit
design and correct component selection is
required.
|
|
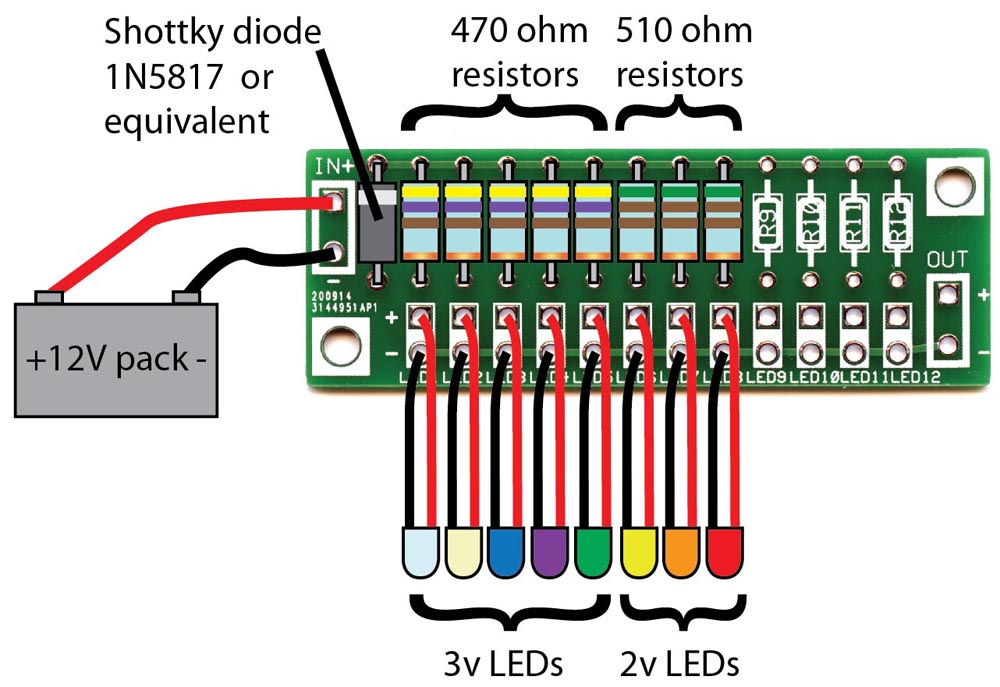
Below is
a typical setup for lighting some LEDs with a 12
volt power supply. In this case, the Shottky diode
is recommended as it will protect the LEDs from
possible damage if the power supply is accidentally
hooked up backwards. It is very important to note that LEDs and the Shottky diode are polarity sensitive, so you must make sure you install them correctly. |
Don't know what values of resistors to use? There are plenty of resistor value calculators and charts online that will help you to know which ones are suitable, such as shown at the bottom of this page:
http://www.gtsparkplugs.com/Dropping_Resistor_Calc.html
If you have specific needs and would like an assembled board made for you at extra cost for labour and components, please email me the specifications of what you want to do and I can provide the finished board.
Keep in mind that this could take a while as I may need to order the required components.
PRICE
The boards ONLY (other components not included) are available for just $9.50 USD each which includes postage (via lettermail) within North America. If you want several, we can work out a "bulk rate" depending on the number you want. If you need other forms of shipping please let me know and I can quote accordingly.
If you wish to order one or more of these boards, please send an email to "jim@smallartworks.ca"
The other components like LEDs, resistors and Shottky diodes are available from any electronics parts retailer or Ebay, Amazon etc. and are usually dirt cheap. Just shop around.
--------------------------------------------------------------------------
This Printed Circuit Board was designed exclusively to Small Art Works specifications by Eric Amirault who can design and build all sorts of specialty electronic products for your needs as well.
He can also do repairs on many electronic items.
You can email him at "eric@eaelec.com"