
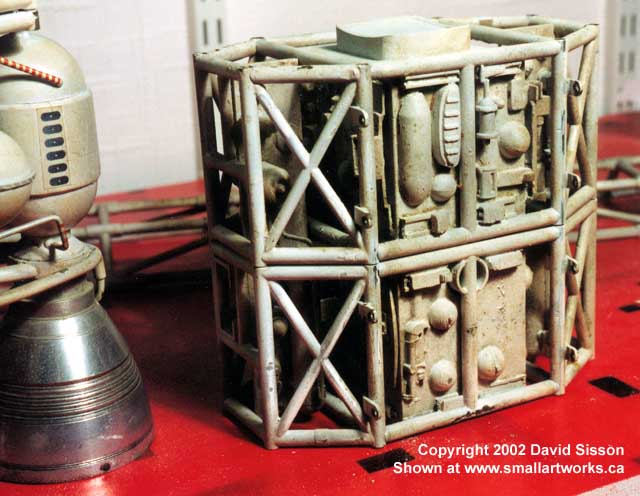
Above
and 2 photos below: The model is carefully disassembled in preparation
for the massive cleanup work and paint stripping required. Above is the
front cage section. Note the bulkhead hatch which fits up to the back of
the nosecone.
To do the job properly would involve dismantling
large sections of the model, a task that would have scared me to death
a few years ago, but having done a similar job on the Overlander from Terrahawks
I felt that I was on familiar ground, although this was going to be a lot
more daunting.
Luckily the job was made easier because
the Eagle can be quickly broken down into a number of sub assemblies. The
nosecone unplugs and splits in two, the passenger pod is just held in place
by two screws and then comes apart, the shoulder pods simply pull out and
the long top frame (spine) unbolts. The Engine section did unplug originally
but the modifications for series 2 permanently joined it to the rear cage.
Each of the two cage sections are in two halves with no direct connections,
they are held in line by the spine and the central corridor detailing.
The first job was to strip down the spine
and solder the joints that had come apart. All of the pipes across
the bottom had come apart, five were missing altogether, so it was only
held together by the pieces across the top and several of those were either
working loose or misaligned. One of the v-shaped side sections at the front
end turned out to be plastic rod so that would also have to be replaced.
One surprise was that the metal seemed to be rusting which seemed odd as
it was all supposed to be made from brass. This turned out to be small
steel pins that had been inserted inside the pipes to help anchor the parts
together when they were originally assembled.
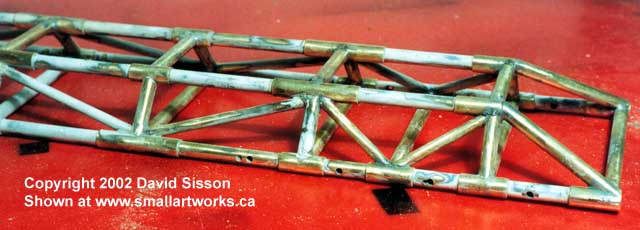
The brass spine
is stripped. cleaned and repaired.
Also, as the spine holds this heavy model
together it has obviously broken from time to time and had to be repaired
by the model makers at the studio. Photographs from the series show pieces
missing or twisted, usually where the supporting wires were attached, and
several joints have been drilled and now have metal rods inserted to try
and prevent this from happening again.
The front cage section was now pulled apart,
the only difficulty here being caused by the two detailed side shelves
catching between the brasswork.
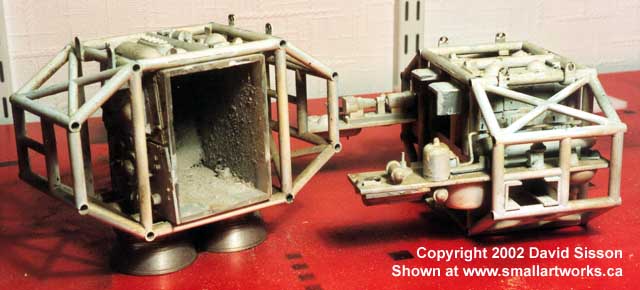
Above and below:
The cage section is pulled apart revealing interior construction.
The central corridor is fabricated from
3mm perspex in two halves, with internal edging to ensure they slot together
inline, and they were coated on the inside with 'moondust' which is probably
a mixture of Fullers Earth and concrete dust.
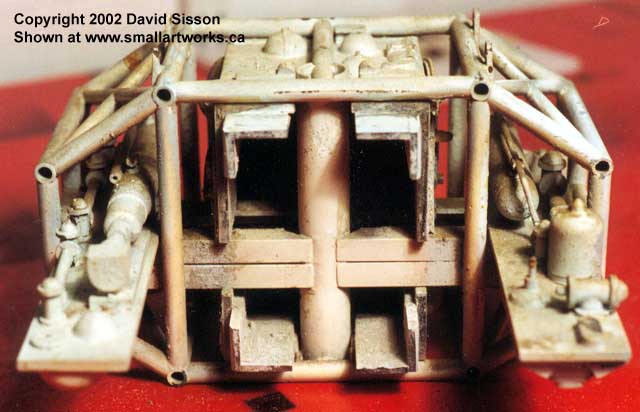
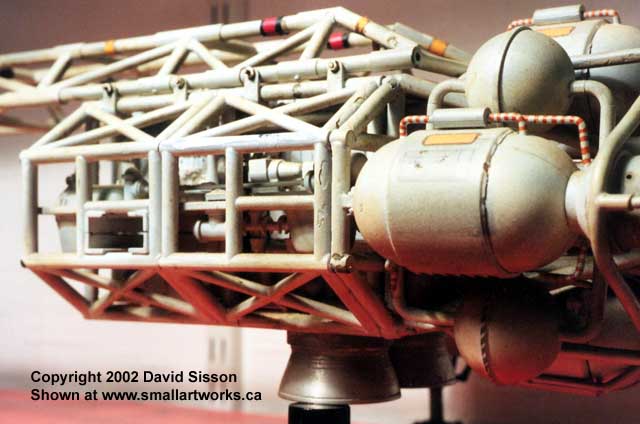
The picture above shows the vertical support
tube that, together with a twin in the rear section, was used to mount
the model on a stand. Also visible running across the cage is the channelling
for the shoulder pod wooden supports.
In order to solder and repaint the cages
it was necessary to remove the corridor and shelves. The shelves were just
epoxy glued to the channelling and came off quite easily but the tight
fitting corridor sections had been detailed with kit parts that effectively
locked them into the brass work. In order to get them out I had to remove
all the kit bashed detailing on the top and bottom panels. This had to
be done very carefully as the plastic parts were very fragile and were
just about ready to fall apart, but with a bit of persuasion I managed
to get them all off. These parts were attached to a piece of card using
double sided tape with small diagrams indicating there original positions
so that I could put it all back together again .The corridor sections were
now extracted and cleaned up using a toothbrush to remove flaking paint
and dust, however the pieces still look rough because various resprays
over the years have trapped a lot of dirt under the paint.
The brass cages were rubbed down with fine
wet & dry paper to remove the outer layers of dirty and loose paint,
then the breaks were soldered and the unit resprayed.
Continued...
|